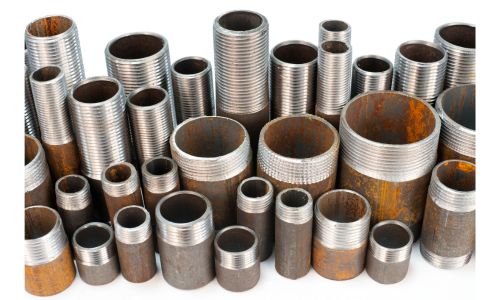
Threading galvanized pipes ourselves can help save a ton of money as opposed to hiring a professional. Though it appears to be complicated, it certainly isn’t.
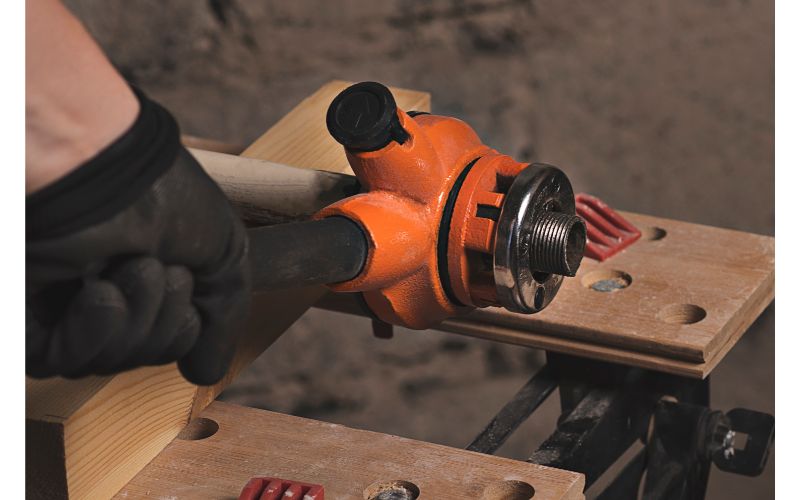
So how to thread galvanized pipe? Place the pipe in the pipe vise and secure it. Apply some lubricant on the edge where you will be threading. Insert the correct size die into the ratcheting pipe threader and turn the ranchette on the pipe threader clockwise. You can use taps instead of dies the same way for internal threading.
Without an in-depth and step-by-step guide, it’s quite difficult to understand. Well, don’t worry, as we have got you covered. Along with it, we will also cover the safety precautions while threading and some additional tips. So let’s get started.
Necessary Tools To Thread Galvanized Pipe
Before we get started with the step-by-step process, you should keep the necessary tools with you. Here are all the tools required to perform threading:
- Pipe vise
- Ratcheting pipe threader
- Deburring tool
- Galvanized pipe
- Die
- Taps (optional and only required if you want internal threading)
- Cutting oil or lubricant
- Tape measure
- A bucket
Step-By-Step: How To Thread Galvanized Pipe
Are you ready with all the tools and materials required to perform threading? Well, let’s get started with the threading process now.
Step 1: Selecting the length
Take a tape measure and measure the desired length of the pipe.
Step 2: Stabilizing the pipe from moving
Here, you have to take the galvanized pipe and place it in the pipe vise. This ensures that the pipe doesn’t move at all during the operation.

Step 3: Place the bucket
As you will be required to fill lubricants, the place can get messier than expected. Moreover, the shavings of the pipe will also be there. Thus, wherever you are performing the threading, make sure there is a bucket right under it to ensure an uncluttered space for work.
Step 4: Reducing friction and increasing cooling
The threading process is all about the pressure, which leads to the heating of the dies and tops. Thus, you need to apply cutting oil or any form of lubricant on the area where you are going to be threading.
Step 5: Setting up the ratcheting pipe threader
Insert the correct die head into the ratcheting pipe threader to set up the ratcheting threader. The size and type of threads you want to cut should be matched with the die head.
Step 6: Positioning the ratcheting pipe threader
The threader goes into the end of the galvanized pipe where you have already used the cutting oil or lubricant. So, position the ratcheting pipe threader over the end of the prepared pipe. Align the die head with the end of the pipe, ensuring that it is centered.
Step 7: Threading
Now that you are all set, apply downward pressure to the threader as you rotate it clockwise with constant force. Thus, you cannot unintentionally shift it in the opposite direction, which can happen when you apply force to it. Thanks to the threader’s mechanism.
Step 8: Until the desired length is met
Remember the desired length you measured using the tape measure? Well, keep the threader rotating until the desired length is met.
Step 9: Deburring
After threading, you will notice debris, metal shavings, and even burrs in the galvanized pipe. This can interfere with the fitting if not cleaned. That’s where the deburring tool comes in handy. Simply put the deburring tool’s head inside the pipe and start rotating it in one direction only.
Here’s a video that might help you visualize deburring better. Even though the video is made for copper pipes, it works for galvanized ones as well;
Step 10: Interior threading
Some may require threading galvanized pipes on the interior side. Well, the process is the same as the exterior ones. However, the only difference is you need to switch to taps from dies. Changing it to taps on the ratcheting pipe threader will do the job.
Step 11: Inspection of the pipes
You need to ensure that the pipes are properly threaded to avoid problems in the future. Start by visually inspecting them. Check for uneven and damaged threading. Once it is confirmed that the pipe cuttings are smooth, the pipes are ready for installation.
Safety Precautions While Threading
Safety should be everyone’s number one priority. Whether it be threading or fitting, we should always maintain proper precautions to reduce the probability of accidents and health hazards. So here are some safety precautions that will be useful when threading:
- Use safety glasses as debris, metal shavings, or any other particles can fly off to your eyes.
- Wear heavy-duty gloves to prevent cuts and compression on your hands.
- Wear a dust mask or a respirator to avoid inhaling harmful fumes or dust particles.
- Threading galvanized pipes releases zinc oxide fumes and dust particles in the air. Thus, working for long hours indoors can cause health problems and a mask wouldn’t be able to save you. So, outdoor threading is preferred.
- Install exhaust fans if working indoors is mandatory.
Pro Tips For Threading Galvanized Pipe
To make the threading galvanized pipe smoother, here are some small tips that will help:
- Make sure your dies are the same size as the pipe diameter you are dealing with.
- Deburring before the threading process can help you make the threading easier.
- Use sandpaper before threading to take out any stuck debris.
- Aligning the die is quite important to make the process smoother. So you make sure the dies are positioned in the middle of the pipe’s end, parallel to its axis.
- Use cutting oil or lubrication frequently on the dies to thread the pipes smoothly every time.
Frequently Asked Questions For Galvanized Pipe
Let’s check out some commonly asked questions regarding threading galvanized pipes.
Q: What kind of lubrication can I use for threading galvanized pipes?
When it comes to lubrication, cutting oil is the best and most effective. However, other alternatives include soap-water solutions and silicone-based lubricants.
Q: How do you check the quality of threaded connections on galvanized pipes?
Apart from visual inspection, you can also ensure the pipes connect tightly and run some air through the joints to check for leaks.
Q: What is the recommended RPM (rotations per minute) for threading galvanized pipes?
Lower RPM is preferred for galvanized pipes as it will cause less heat during the process. There’s no recommended RPM for that yet to give you an idea, 25-30 RPM is good enough.
Conclusion
To conclude, that was all you needed to know about how to thread galvanized pipe. The process is quite simple: select the appropriate die, place it into the ratcheting pipe threader, and apply lubrication. And this should be followed by inserting the threader in the pipe and rotating it clockwise.
However, don’t forget about deburring. You must do that; otherwise, you will come across leaky fits. Additionally, safety should always be the priority. Perform the threading outdoors if possible, and wear gear to protect yourself.

