
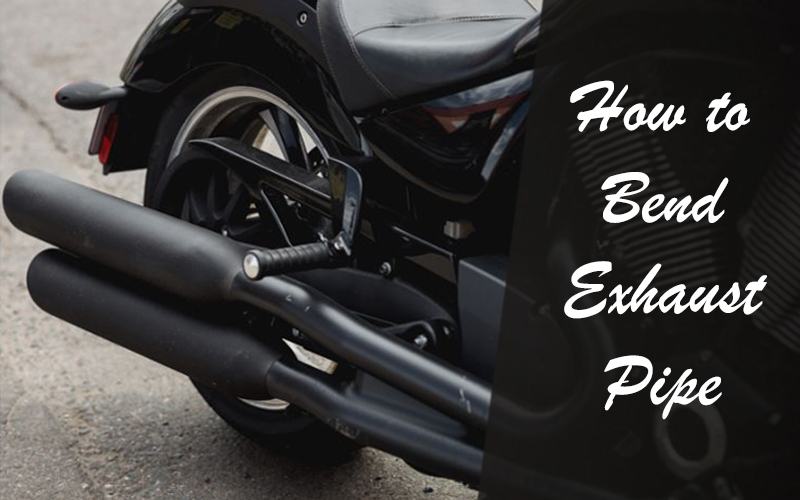
If you want to increase your vehicle’s horsepower, one thing you can do is bend your exhaust. This procedure not only increases the horsepower but also amplifies the roar of your engine. And which engine performance enthusiast doesn’t like a more robust engine note?
So, what procedure on how to bend the exhaust pipe should you follow? Well, there are several procedures you can follow to do this. The methods are as follows.
- Hydraulic press bending method.
- Torch bending method.
- Harbor freight bending method.
- Using your hand if you have no tools.
This article is your comprehensive guide to unraveling the intricacies of exhaust pipe bending. We will cover everything, every twist and turn you need to do the procedure well. We will also give you insider tips at the end of the write-up so that you can avoid common mistakes during the procedure. So, shall we get started?
Tools Needed To Blend Exhaust Pipe
Before you start the procedure, you should have all the tools needed at hand. This minimizes time wastage in finding the tools one by one. For this procedure, we recommend that you have the following at hand:
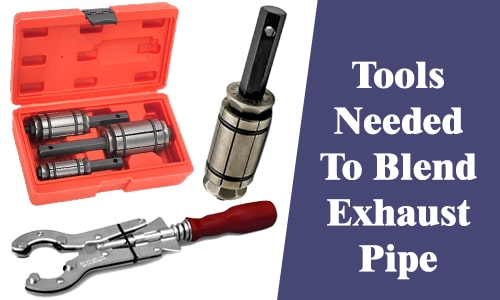
- Pipe bender: Choose one that will suit your exhaust pipe. The best type is hydraulic bender as it needs no effort from you. It also has the best accuracy. If you are on a budget, we recommend using the Harbor Freight Bender.
- Safety gear: These are for your safety against sparks and other hazards in the process. They include safety goggles and gloves.
- Measuring tools: You need to make accurate bends for maximum performance. This is why we recommend having a marker and a tape measure.
- Vice and clamp: These two are essential in stabilizing the pipe. When stable, you can manipulate it in a controlled manner.
- Angle finder or protractor: This will measure the bend angles accurately.
- Deburring tool: Ensures you have smooth edges for optimal flow.
- Hammer and mallet: The two will shape your bends.
- Sand: Used as a filler to create perfect bends.
- Heat source: This could be a torch or a charcoal furnace.
- Lift, or jack stands: For lifting your car to facilitate easy access to the exhaust.
- Set of socket wrenches: For opening all the bolts that hold the exhaust in place.
- Welder: This is optional. Its use is to secure the new bend.
Once you have everything mentioned above, you are now ready to embark on the journey to streamline your vehicle.
How To Blend Exhaust Pipe? Step By Step Guide With a Hydraulic Press Bender
Follow these steps to the end to bend your vehicle’s exhaust pipe efficiently.
Step 1: Set Up the Work Area
Before diving into this procedure, you need an optimal work environment. Here is how you can meticulously set up the area:
- Choose a well-ventilated area: We recommend undertaking this procedure outdoors. If you must do it in a garage, then it must be well-ventilated. This will prevent fumes from accumulating in the area once you are done bending and testing the outcome.
- Stability matters: Bending uses a lot of force. So you need to ensure your workbench is in a stable place. Also, it needs to be at the appropriate height.
- Lighting: This is a process that needs precision. With a bright source of light, there will not be shadows. This will enhance the visibility of your measurements and markings.
Step 2: Lift the Vehicle
This ensures that you have optimal access to your exhaust. Use these steps to lift the vehicle:
- Engage the parking brake: This will prevent your vehicle from rolling while in the process of lifting.
- Begin jacking: Place your jack under all four jacking points on your vehicle. Ensure the jerk is centered and aligned to these points. Slowly pump it to raise the vehicle. You do not need to raise it a lot. Just enough so that the clearance allows you to access the exhaust.
- Slide in jack stands: Once the right height is reached on each side, slide stands on each side. Ensure they are securely in place to avoid accidents.
We recommend that you give your vehicle a light shake. This will check to confirm its stability before going beneath it.
Step 3: Remove the Exhaust
Bending the exhaust is easier when detached from the car. While you can bend it while still attached to the car, the procedure will be demanding. It could also lead to damaging adjacent car parts. Use the following procedure to remove the exhaust:
- Safety first: Put on your goggles and safety gloves. The underside of any car has lots of debris. The two will protect you from injuries from such debris.
- Loosen the bolts and nuts: Use appropriate wrenches and sockets to do so. Begin with the clamps that secure the exhaust to the headers and manifold. If the bolts cannot be loosened easily, we recommend using penetrating oil. Spray it on the bolts in question. Sit back for a few minutes to allow it to penetrate.
- Label the parts: If you are a novice, be sure to label every component you disconnect. This will facilitate easy assembly later.
- Support the exhaust: As you loosen these bolts, be sure to support this part. You do not want it to fall suddenly on the ground.
Once all connections are loosened, carefully lower the exhaust. We recommend that you have a helper to assist you. With an extra hand, the chances of having damage from adjusting car parts are minimal.
Step 4: Measure and Mark
Accurate measurements are essential for bending your exhaust. Follow these steps to measure and mark precisely:
- Identify the bend locations: Determine where you would like to introduce a bend. This decision will be solely based on your vehicle specifications, space constraints, and your performance goals. The best place to have a fold is 12 inches away from the manifold. This is where the straight pipe meets the more flexible section near the back of your vehicle.
- Select the bend angle: This also depends on your vehicle model. You need an angle that will maintain clearance from other components in the underside of your vehicle. For most vehicle models, a 45-degree bend will be the best. This angle allows for improved exhaust flow while maintaining clearance from other components.
- Mark with precision: Use a tape measure to identify the point of your bend. Mark this point with a clear distinction. Use a protractor to also measure the bend angle from the point you have marked above.
- Visualize the bend: Now go back to your vehicle and measure the bend point and angle. Confirm that these measurements correspond with your vehicle’s design. If they do, go ahead to the next step. If they don’t, adjust the bend point and angle.
- Additional marks: If you plan to have multiple bends, repeat the measuring process accordingly.
Step 5: Prepare for Bending the Exhaust
Start by inspecting the pipe. You need to ensure that there are no damages in the area where you want the bend to be. Bending a corroded exhaust could lead to breakage.
If it’s corroded or has any holes, address these issues before the step. For holes, repair them by welding. For corrosion, you will need to cut the exhaust pipe and replace the corroded part.
Step 6: Bending the Exhaust
Now, this is the heart of the process. Here is how you can bend the exhaust:
- Position your pipe bender: Place your exhaust pipe into the jaws of the hydraulic pipe bender. Ensure the mark you made in step 4 lines up with where the bend will start.
- Tighten the bender: Secure the exhaust in place by tightening your hydraulic bender jaws. This will hold it in place to prevent any accidents that can happen with unexpected movements. If you do not know how to operate the machine, this would be the perfect time to familiarize yourself with the controls. You could also read the user manual to avoid any surprises along the way.
- Mark your bend angle: Set the desired bend on the control panel. Also adjust the pressure based on the thickness and the material of your pipe. We recommend having as less pressure as possible since exhausts are normally not that thick. A good starting point is 5 tons of pressure. Should yours be thick, go ahead and set a higher value.
- Initiate the bend: Gently press on the button in your control panel to initiate the bend. The machine will move its jaws in place and start applying force to your exhaust.
- Maintain steady pressure: Hold your pipe as firm as you can in the opposite direction of the bend. This is essential to preventing any accidents should the pipe slip off the jaws of the benders. It will ensure that it doesn’t fly out to damage other components in your garage.
- Finishing up the bend: Once the set angle has been attained, the machine will stop. Loosen the pipe from the bender’s jaws by pressing the button to retrieve the bender jaws. Be sure to retrieve it slowly. Sudden movements can cause the exhaust to snap back. Repeat the procedure if you have multiple bends. You can use a welder to secure the bend if you are skeptical about its strength.
Here is a YouTube video that illustrates this process visually:
Step 7: Returning the Exhaust and Testing
With your exhaust nicely bent, it’s time to take it back to its rightful place. Here is how to do it:
- Position the exhaust: If you can get a helper for this step, do so. Carry the bent exhaust and maneuver it in place. Align it with the mounting points as it was originally attached.
- Reconnect hangers: Begin by sliding in all the hangers and hooks that support the exhaust along the underside of your car. Fix them tightly as they were.
- Bolt it back: Use wrenches or sockets to attach any bolts or nuts that secure the exhaust. Begin with the components that connect the exhaust to the headers and manifold.
- Check alignment: Ensure that the bent pipe aligns with your vehicle layout and undercarriage. Confirm that the pipe steers away from any sensitive surrounding components.
- Lower the vehicle: Once you are confident that everything has been done perfectly, lower the vehicle. Remove the jack stands and lower it gradually till it rests on its wheels.
- Test drive: Start the engine. Listen closely and pay attention to any unusual sounds or vibrations. These will indicate that you have installed it wrongly. Do not stop there; also consider taking the car for a test drive. Confirm that the exhaust performs as you speculated. Listen to the changes in the exhaust note and performance for different terrains.
Bending Exhaust Pipe With Harbor Freight Bender
You can bend your exhaust using a Harbor Freight Bender, too if you don’t have access to a hydraulic press. This is a simple bender that is compact and needs no expert skills to use. Follow the steps below:
Step 1: Prepare the Bender
Set up your Harbor Freight bender accordingly. This involves attaching all the bending surfaces as needed. It also involves using bending clamps that match the diameter of your exhaust.
Step 2: Position the Pipe
Place your exhaust pipe into the bender’s jaws. Make sure the part where you want the bend to start is exactly lined with the bender’s jaws. Use a protractor to measure how much bend you will have and mark it on the Harbor Freight equipment.
Step 3: Start the Bending
All you need to do is push the handle to one side. Do so gently. Pushing instantly with a lot of force could lead to breakages. So, aim for a smooth, gradual, and steady bending rate.
Step 4: Watch the Angle
As you push, keep looking at the mark you made. Keep pushing until the exhaust lines with this mark. Once lined up, release the handle.
Step 5: Inspect the Outcome
Ensure the bend looks good. It should not have weird twists or any crinkles. If it has any, consider straightening it and then repeating the process from another bending point.
Here is a YouTube video to illustrate how to use Harbor Freight Bender. Keep in mind this person is not bending an exhaust but rather a metal. However, the video will give you practical insights into how you could use the tool to bend an exhaust pipe.
Bending Exhaust Pipe With Torch
For easier bending, you can also consider using a torch. Follow the steps below:
Step1: Ensure You Have the Right Torch
We recommend using a propane-type torch. This kind of torch provides the heat required without being extensively intense. It should be with a fresh canister to avoid it dying in the middle of the process. As always, you will need safety gear when handling such. This includes a fire extinguisher, just in case. You will also need goggles to shield your eyes and heat-resistant gloves.
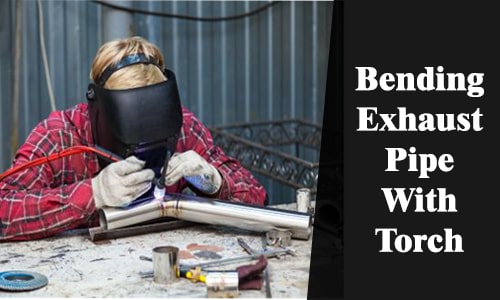
Step 2: Measure the Bend Position
Use a tape measure to know the best place for your bend to start. Mark this place using a marker or ink. This will be your reference point as you proceed to the next steps.
Step 3: Heat the Area
Put your safety gear on and start the process. Hold the flame about an inch away from the exhaust. Also, be sure to move it back and forth in gentle dances.
Step 4: Watch Out for Color Change
Keep an eye on this metal as it heats up. It will transform to cherry red. That is when the metal is ready for bending. It takes time for the metal to achieve this color. It all depends on your exhaust material type, thickness, and heat resistance. So, exercise patience.
Step 5: Bending the Exhaust
You can use a pipe bender, a hammer, or a mallet to do so. The bending will require less force since the spot is already heated up. Just be sure to do the bending gradually until it reaches the desired angle. There should not be any sudden jerks as they will lead to errors.
Step 6: Cooling Off
Spray a little water on the hot spot. Do so gently to avoid rapid cooling, which will lead to extra bending. Alternatively, you could leave the exhaust for several minutes to hours and let it cool off naturally.
Step 7: Measure the Angle
Once the cooling part is over, take your protractor and tape measure. Confirm the location and the angle of the bend are accurate. If inaccurate, repeat the process again to correct the error.
How to Bend Exhaust Pipe by Hand?
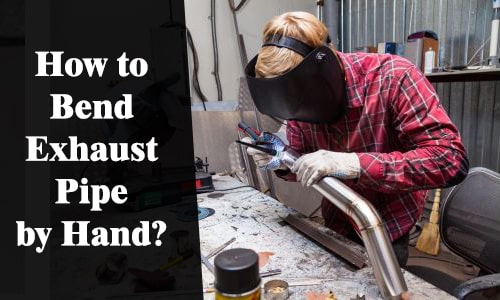
Bending an exhaust by hand is possible, but we do not recommend it. This is not the quickest or easiest method. It is also not accurate and could potentially break your exhaust.
However, you can successfully use your hands to bend the pipe by following these steps to the latter:
Step 1: Know the Bend Start Location and Angle
Before you even think of applying your hands on this pipe, take a moment and measure where you want the bend. While using your hand to bend, you need a high level of precision.
Step 2: Push the Exhaust Gradually
Clamp the exhaust in place so it won’t move to the side you intend to bend to. Wear your safety gear and start pushing to bend them. Begin the process gently and cautiously to avoid bending on the wrong mark.
Step 3: Use Your Body Weight
With the pipe firmly grabbed with your hands, you can take advantage of your body weight. If you are aiming for a downward bend, for example, you could gently swing on the pipe. However, be sure to keep an eye on the angle and also ensure the bend is gradual and not instant.
Step 4: Measure, Prove, Repeat
As the bend takes shape, pause several times to measure your achievements. This will tell you how much is left and what amount of force to apply. When you are closer to the angle, you need to apply less and less force gradually.
How to Bend an Exhaust Pipe at Home?
Bending pipes might seem to be an exercise left to people with fully equipped garages. However, this is not the case. Here is a step-by-step guide to a creative process you can use at home:
Step 1: Sourcing Materials
At home, you surely have a charcoal furnace. We will be using this for the procedure. You can also access sand from your lawn or outside the house. Collect enough sand that fills your exhaust.
Step 2: Sieve the Sand
You do not want to have rocky sand in your exhaust when bending. This could lead to imperfections. So, use a sieve and filter all those pebbles and debris. You should be left with fine sand.
Step 3: Remove Moisture from the Sand
Into a large pan, put the sieved sand. Heat it while stirring occasionally to remove moisture. This step ensures that your sand is dry enough to shape your exhaust.
Step 4: Fill the Exhaust with Sand
Use a metal scoop to fill your exhaust pipe with this hot sand. Be sure to seal one end with a metal cork or one that is heat resistant. Tap the pipe with a hammer once full. This will help the sand settle deep. Add more sand while tapping with a hammer till it’s full.
Step 5: Seal the other End
You need to contain this sand in the pipe. Hence, seal the other end with a heat-resistant material that will prevent the sand from escaping.
Step 6: Do Your Measurements
Measure the exact place where you want to have the bend. Mark it with ink or a marker. You could also use a sharp metal to scrap the exhaust surface.
Step 7: Heat the Pipe
Now place the pipe into your charcoal furnace. Apply heat to the market spot till it changes to cherry red. Keep turning the pipe over till the whole area has this color.
Step 8: Start the Bending
You can use a pipe bender if you have one at home. You can also use a hammer or your hands to gradually bend the exhaust. Just make sure you start the bend from the place you marked. Also, ensure you have the right angle by measuring it periodically as you continue to bend.
If the metal turns back to its original color during bending. Stop the process and heat it again to cherry red. It is easier to bend it at home when it has this color.
Here is a YouTube video that illustrates all the above steps visually:
How to Bend Exhaust Pipe Without Pipe Bender?
Bending an exhaust pipe without a pipe bender might seem impossible. However, it is entirely possible if you are creative. Here are ways you can achieve bends without the tool:
- Hammer or mallet: Just know the place where you want your bend to start. Gently start tapping with your hammer or mallet. Increase the force as the metal begins to respond. When inching closer to the designed angle, reduce the force.
- Using another pipe: Slide a pipe with a slightly smaller diameter into the exhaust. Ensure you know the place where you want the bend to start. Attach your exhaust to a strong clamp. Finally, use your hand to apply force to the smaller pipe.
- Use a tree: Put your exhaust on top of a tree branch that has a clearance from the ground same as your height. You can also use a tree stem for bending. Fill the exhaust with sand. Grab both sides of the exhaust and push them. Apply gradual pressure till you achieve the desired angle. Here is a video illustrating how to bend an iron pipe with this method. An exhaust pipe is an iron pipe, so you can get some insights from the video:
- Jig with wood: Find a strong wood that can fit inside your exhaust. Clamp the exhaust and put the wood till where you want the bend to start. Push the block of wood till you achieve the desired bend.
- Bend with a friend: This method calls for collaboration. Enlist a friend or family member as a bending partner. Let them hold onto one end of the pipe. They should do so firmly. On the other hand, apply controlled pressure to gradually shape the bend.
Effective Tips For Blending Exhaust Pipe
Bending your exhaust effectively demands more than just technique. It requires a deep understanding of the craft. Here are some valuable tips that will help you avoid messing up with your exhaust:
- Precision measurement: Before you even think of starting the bending process, measure. Go to your car, check the best angle, and know the best position to start the bend. If need be, you can have multiple bends. Don’t forget to double-check all the measurements. Even a fraction could affect the outcome.
- Mark clearly: Marks act as the beacons for navigation when bending. So you need to use a marker or chalk that will create lasting marks. The bend location should be clearly visible throughout the process.
- Safety gear always: Do not underestimate your safety. This is your only shield to good health. So wear safety goggles to protect your eyes from sparks and any debris. Also, wear gloves to shield you from sharp edges and heat.
- Apply gradual pressure: Do not be in a hurry. Think of your exhaust as clay in the hands of an artist. Regardless of whatever method you are using, you need to be gradual and steady. Slow and steady will win the race. When you rush, you will have uneven bends and damaged pipes.
- Mind the heat: If you are using a method that involves heating the exhaust, do so in a controlled manner. Too much heat could lead to the weakening of the exhaust and eventually breaking. It could also cause undesirable discoloration.
- Trial and error: We all know that Rome was never built in one day. As such, do not expect to be perfect during your first trial. Just be patient and try until you nail the perfect angle. Each bend will refine your technique and deepen your understanding.
If you are concerned about this trial and error ruining your exhaust, you could start by practicing with other pipes in your garage. Once you nail the art, you can move to bend your exhaust.
Conclusion
In the world of automotive, you need to master several skills if you want DIY. One of them is knowing how to bend exhaust pipes. Throughout this article, we have covered everything you need to know about this craftsmanship. From using your hands, Harbor Freight bending tool, and so forth, you are now knowledgeable.
Just remember that this craftsmanship needs patience. You won’t just read this article and go straight to bend that exhaust pipe perfectly. No, you will only improve your exhaust bending skills with more practice. Don’t forget to adhere to the tips given in this write-up, too, to avoid ruining your exhaust.
Michael
Michael is the owner of Michael's Plumbing. He has experience over 15 years solved thousands of plumbing issues. 100% customer satisfaction made him best in this sector. Finally he decided to share his skills, experience and techniques through this PipesYard blog. Hopefully each and every post of this blog will be helpful for people seeking piping help.