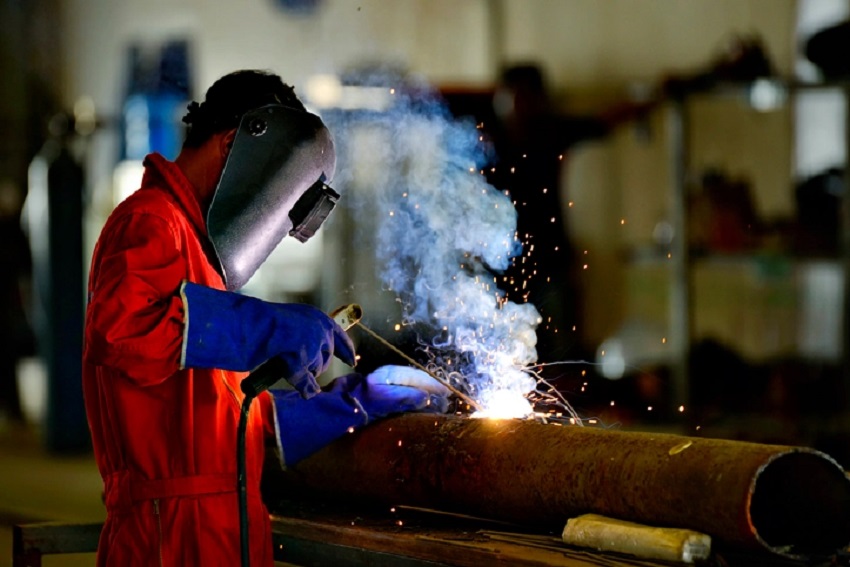
As a DIY enthusiast, knowing how to weld pipes can save you time and money. It can also help you complete projects more efficiently. However, welding pipes can be a challenging task, especially for beginners.
To weld pipe, you need to
- Clean the surfaces of the pipes
- Fit them together
- Tack them in place
- Then create a continuous weld along the joint.
The specific welding process and techniques will depend on the pipe type and welding machine used.
It’s essential to use the appropriate filler material and electrodes and take necessary safety precautions. This guide will provide an in-depth and detailed overview of the welding process, welding techniques, and more.
Types of Welding
Here’s a table summarizing some common types of welding.
| Type of Welding | Description | Advantages | Disadvantages |
| Tungsten Inert Gas (TIG) | Uses a tungsten electrode and inert gas to weld metals | Precise and clean welds | Slow process |
| Suitable for thin metals | High skill required | ||
| Metal Inert Gas (MIG) | Uses a wire electrode and inert gas to weld metals | Fast process, suitable for thick metals. | Less precise than TIG. |
| MIG welding is the most simple to learn. | |||
| Shielded Metal Arc Welding (SMAW)/ Stick metal arc | Uses a coated electrode and electric current to weld metals | Versatile, suitable for outdoor use | Produces slag that must be cleaned off |
| Flux-Cored Arc Welding (FCAW) | Uses a tubular wire electrode with flux to weld metals | Fast process, suitable for thick metals | May produce more fumes than other methods |
| Resistance Spot Welding | Uses two electrodes to apply pressure and heat to two metal surfaces, fusing them together | Fast process, suitable for thin metals | Limited to specific joint configurations |
The Fundamentals Of Pipe Welding
Here are some of the basics you should know before welding pipes.
Passes Used In Pipe Welding
A welding pass refers to a single progression of welding along the length of the pipe. Below are some common passes used in pipe welding:
Root Pass
The root pass is the first pass in pipe welding, which involves fusing the two pipe edges. It is the most critical pass since it determines the quality of the welded joint.
The root pass should be free from defects like porosity, cracks, or lack of fusion. In addition, the root pass must have proper penetration to ensure the joint is firm.
Hot Pass
In most welding procedures, it comes after the root pass and before the fill pass. The hot pass is critical in pipe welding, especially when great strength and pressure resistance are required.
The hot pass aids in the formation of a strong connection between the root and fill passes. The hot pass is critical in welding processes that involve thicker pipes since thicker pipes require more heat to penetrate.
Fill Pass
The fill pass follows the root and hot pass, and its primary purpose is to fill the gap between the pipes. A fill pass is the portion of a weld bead required to fill a specific welding joint.
This pass is typically made using a technique known as the weaving technique, which involves moving the electrode in a side-to-side motion to fill in the gap.
Cap Pass
The cap pass is the final pass in pipe welding, covering the entire weld joint. The cap pass should have a smooth and even surface and should be free from any defects. The cap pass determines the appearance of the welded joint, and it should have a consistent width and height.
Pipe Welding Positions
Pipe welding positions refer to the angles at which the pipe is welded. The welding position is essential since it affects the quality and strength of the welded joint. Below are the four primary pipe welding positions:
1G Position
The 1G position, also known as the flat position, involves welding the pipe horizontally. The pipe is placed on a horizontal surface, and the welder can move around the pipe to make the weld.
This position is the easiest to weld because gravity helps hold the molten metal in place and prevents it from sagging or dripping.
2G Position
The 2G position is also known as the vertical position. It entails placing the pipe on its base, which makes it considerably stable and more sturdy to weld. This position is even more challenging than horizontal position welding because the molten metal tends to flow downward, away from the weld.
Welders must compensate for this using a slower welding speed, a smaller electrode, and a narrower weld bead.
5G Position
The 5G welding position is similar to the 1G position in that it uses a horizontally mounted welding pipe. The main difference between the two is that the pipe in the 5G position has no room for movement, and the welder can only make vertical motions.
6G Position
The 6G position is also known as the inclined-fixed position. In this position, the pipe is fixed at a 45-degree angle, and the welder must weld the joint vertically.
This is the most difficult position because the welder must work overhead and upside down.
How To Weld Pipes? – Step-By-Step Procedure
This step-by-step guide will discuss how to weld pipes, including preparation, safety, and welding techniques.
Safety Precautions
Before starting the welding project, you must take safety precautions to protect yourself and those around you. Here are some safety precautions to follow when welding pipes:
- Wear appropriate protective gear, including welding gloves, helmets, and protective clothing.
- Make sure the area is well-ventilated to prevent fumes from building up.
- Keep a fire extinguisher nearby.
- Remove any flammable materials from the work area.
- Be mindful of the welding arc; do not look directly at it without proper eye protection.
Pipe Preparation
The first step in welding pipes is to prepare the pipes for welding. Proper preparation is crucial to ensure a strong, high-quality weld. Here are the steps to follow:
- Clean the surface of the pipe to remove any dirt, rust, or debris. Use a wire brush or sandpaper to clean the surface thoroughly.
- Bevel the edges of the pipes that will be joined. Beveling helps to create a groove for the weld and ensures a stronger bond between the pipes. The bevel angle will depend on the thickness of the pipe and the welding process used.
- Align the pipes to ensure they are straight and even. Use clamps or magnets to hold the pipes in place.
Choosing the Right Welding Technique
As discussed above, you can use several welding techniques when welding pipes. The method you choose will depend on the type of pipe you are welding, the thickness of the pipe, and the welding equipment you have.
- TIG Welding: TIG welding is a precise and clean technique ideal for thin pipes and accurate welds.
- MIG Welding: MIG welding is a versatile technique suitable for various pipe thicknesses and materials.
- Stick Welding: Stick metal welding is a widespread technique ideal for heavy-duty welding applications and thick pipes.
Welding Process
Once you have chosen the welding technique, it’s time to start welding the pipes. Here are the steps to follow:
- Step 1: Set up the welding equipment, including the power source, welding torch, and filler material.
- Step 2: Position / tack the welding torch at the start of the weld joint. Tacking is the process of joining two pieces of metal together temporarily to ensure they stay in place while you weld.
- Step 3: If you use Stick welding, strike the arc by tapping the electrode on the metal. Using TIG or MIG welding, use the foot pedal or trigger to start the arc.
- Step 4: Move the welding electrode or gun along the weld line, ensuring that the weld is consistent and that there are no gaps or voids.
- Step 5: Welding generates a lot of heat, which can distort the pipes. Use the proper heat to prevent distortion and ensure the weld is solid and stable.
- Step 6: If you use TIG or MIG welding, add filler material to the joint as you weld. Ensure you choose the suitable filler material for the job and use it correctly.
- Step 7: Make sure the weld bead is even and smooth.
Post-Welding Process
After the welding process, it’s essential to take steps to ensure the weld is solid and durable. Here are the post-welding steps to follow:
- Allow the weld to cool down slowly to prevent cracking or warping.
- Inspect the weld for any defects, including cracks or porosity.
- Clean the surface of the weld to remove any slag or debris.
- Perform any necessary post-welding treatments, such as stress relieving or annealing.
Conclusion
This comprehensive guide gives beginners the knowledge and skills to weld pipe successfully. Understanding the different passes used in pipe welding and the positions a welder may require to weld efficiently.
Following the step-by-step process, you can create solid and durable welds for various projects. Always wear protective gear, choose the proper welding technique, and inspect the weld for defects.
With practice and experience, you can improve your welding skills and create high-quality welds that meet industry standards.
Michael
Michael is the owner of Michael's Plumbing. He has experience over 15 years solved thousands of plumbing issues. 100% customer satisfaction made him best in this sector. Finally he decided to share his skills, experience and techniques through this PipesYard blog. Hopefully each and every post of this blog will be helpful for people seeking piping help.