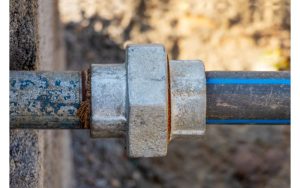
Did you know that the foundation of any efficient plumbing system is secure connections, preventing messy and costly leaks? This is where the pipe joint compound, also known as PVC glue, becomes essential.
But the question remains, how can you apply pipe joint compound correctly? You can follow these steps for applying pipe joint compound:
- Start by cleaning and drying your pipes and fittings.
- Next, brush a uniform layer of compound to the male pipe thread.
- You should use the appropriate amount of pipe dope for a secure seal.
- Once that’s done, connect the pipes and fittings and carefully tighten them.
In this article, we will provide you with a step-by-step process of correctly applying pipe joint compound, so you can confidently tackle your plumbing tasks with ease.
Pipe Joint Compound: What Is It And Its Purpose?
Pipe joint compound, sometimes called pipe glue, pipe dope, or thread sealant, is a powerful paste like substance. It creates unbreakable and leak-proof connections between pipes by filling in the gaps between their threads.
They are made up of a combination of materials such as petroleum jelly or polytetrafluoroethylene (PTFE), fillers, and lubricants. They have a range of fantastic properties, with benefits including as follows.
❖ Prevents temperature fluctuations.
❖ Protects pipes against loose fittings and leaks.
❖ Fills in the gaps between pipe threads effectively
❖ Resistant to high pressure and temperature variations
❖ Durable and long-lasting
❖ Easy to apply and work with
❖ It helps to prevent corrosion and rusting
❖ Compatible with various pipe materials and fluids
❖ Pipe joint compounds are resistant to a wide range of chemicals
Certain compounds, especially those containing PTFE, can withstand various pressures and temperatures without breaking down. Thus, it ensures a robust and reliable bond that lasts for ages and keeps your plumbing system rock-solid.
What Are The Different Types of Pipe Joint Compounds Available In The Market?
If you are unfamiliar with plumbing work, it may be challenging to choose among the many different pipe joint compounds available on the market. Take a look at the table below to learn more about various pipe joint compounds.
| Pipe Joint Compound | Features | Benefits | Drawback | When to Use | Price Range |
| Pipe Dope | It is a paste or liquid compound | Provides a strong seal, and it’s resistant to high pressures | It can be messy to apply and requires time to dry | Ideal for sealing metal pipe joints | $5 – $20 per container |
| Pipe Thread Sealant | It is a liquid compound with PTFE particles | It forms a durable seal, and it is resistant to leaks | It is not suitable for plastic pipes | Ideal for high-pressure pipe connections | $5 – $15 per container |
| Silicone Sealant | It is a flexible sealant | It’s resistant to water, UV rays, heat, and chemicals | Don’t use it in high-pressure systems | Ideal for plumbing repairs and sealing joints | $5 – $15 per tube |
| Anaerobic Adhesive Pipe Sealant | It is a gel-like compound that cures without air | It forms a strong bond under high-pressure conditions | It requires a long curing time | Ideal for sealing pipe joints in industrial applications | $10 – $30 per container |
| Teflon Tape | It is a thin, flexible tape with PTFE coating | It is easy to apply and seals pipe threads effectively | It may require reapplication over time | Suitable for sealing pipe threads in various applications with lower pressure | $1 – $5 per tape. |
How To Apply Pipe Joint Compound: A Detailed Guide
Follow the instructions we have provided below if you want to effectively apply the pipe joint compound and achieve a strong and waterproof seal.
Step 1- Wear protective gear
You should never attempt any plumbing or electrical DIY projects without wearing safety gear and protective clothing. When working with pipe joint compounds, you should always wear gloves and safety glasses to prevent irritation of your hands and eyes.
Step 2- Clean the surfaces
Firstly, you need to use a wire brush or a microfiber cloth to clean the surfaces of the pipes and fittings that will be joined together. This ensures that the surface is free of debris and rust, which can compromise the bond created by the compound.
Step 3- Apply the pipe joint compound
In this step, use a brush or your index finger to apply a thin layer of pipe joint compound onto the male threads of the pipe. Be sure to apply the compound evenly, covering the entire surface.
Step 4- Insert the pipe
Next, you need to insert the male-threaded pipe into the female-threaded fitting, turning it clockwise until it is hand-tight.
Step 5- Tighten with a wrench
Use a wrench to tighten the pipe a further one to two turns after it has been hand-tightened. This ensures a tight fit, but take care not to tighten it too far.
Step 6- Clean up the excess compound
In this step, take a clean towel and wipe away any excess compound that may have squeezed out during the threading process.
Step 7- Allow the compound to dry
Afterward, you must wait at least six hours for the compound to dry completely before turning on the water or gas supply. During this period, you should avoid applying pressure to the joint.
Check out the YouTube video for more information.
How To Maintain Pipes After Applying Pipe Joint Compound? Tips And Tricks
The following advice will help you maintain the health of your pipes for a long period.
❖ Pipe joint compounds can deteriorate over time. Thus, you should frequently check the joints to make sure they are tightly sealed.
❖ Do not flush harsh chemicals down the drain that might harm the pipes, such as bleach or drain cleaners.
❖ You should insulate your pipes to protect them from extreme temperatures that can cause them to crack or burst.
❖ If you notice any signs of damage or leaks, have them repaired promptly to prevent further damage to the pipes.
❖ If you live in an area with hard water, consider installing a water-softening system to minimize mineral buildup in your pipes.
❖ You should be careful of what you flush down the toilet and pour down the drain. This can include items like baby wipes, grease, and paper towels, which can lead to clogs and damage your pipes.
Some Common Questions
If you want additional information on how to apply pipe joint compound, check out the FAQs below.
Q: Can I use Teflon tape instead of pipe joint compound?
Although Teflon tape is frequently used in place of pipe joint compound, it might not be appropriate in all circumstances. Teflon tape is generally more appropriate for applications involving smaller pipes and lower pressures.
Pipe joint compound is often more efficient for longer pipes and higher-pressure applications.
Q: How long does the pipe joint compound last?
Pipe joint compounds can last for many years if it is used correctly and the joint isn’t disturbed or subjected to harsh conditions. It’s advised to reapply the compound as required and regularly check for leaks to ensure the seal remains intact.
Q: Can I use a pipe joint compound on gas pipes?
Yes, you can use pipe joint compounds on gas pipes, but it’s important to use the appropriate type of compound that is designed for this purpose.
Q: Can pipe joint compound be used with Teflon tape?
If you want more sealing power, you can use Teflon tape in addition to the pipe joint compound. When using both, you should apply a small amount of pipe joint compound to the threads before wrapping them with Teflon tape.
Final Words
In conclusion, applying pipe joint compound requires proper attention to detail and the use of appropriate tools and methods.
By following the outlined steps in this article, you can ensure that your pipe joints are correctly sealed and free of leaks. Remember that it is crucial to choose the right type of pipe joint compound that is compatible with your specific plumbing system and its intended use.
Also, be aware of factors like pressure, humidity, and temperature that can affect the performance of the pipe joint compound. If you apply the right product in the right way, it can increase the lifespan of your pipes, prevent leaks, and reduce maintenance costs.

